


Implement 3 Straightforward Flower Preservation Techniques
Posted on 30/05/2025
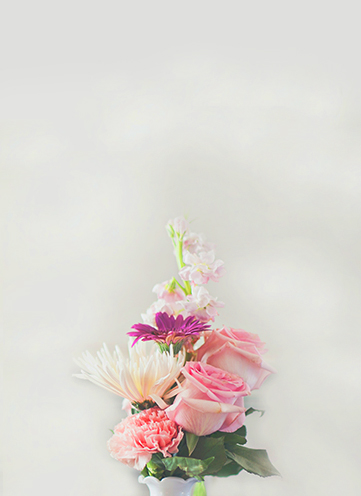
Flowers have an enchanting ability to capture moments, evoke emotions, and bring vibrant beauty into our lives. Whether it's a special bouquet, wedding floral arrangements, or garden blossoms you adore, preserving flowers means you can cherish these memories for years to come. In this comprehensive guide, we'll explore three straightforward flower preservation techniques that are beginner-friendly, effective, and perfect for anyone looking to immortalize their favorite blooms.
Why Preserve Flowers? - The Timeless Appeal of Dried and Saved Blooms
Preserving your cherished flowers not only extends their beauty but also allows you to create heartfelt keepsakes, stunning decor, and even unique gifts. Flower preservation is a rewarding activity that connects you with nature and enables you to hold onto precious moments. Whether you want to retain the colors of a passion-filled bouquet or display a garden's seasonal glory in your home, learning to implement easy flower preservation methods offers lasting enjoyment.
In this article, we'll discuss:
- Pressing Flowers - A classic, flat preservation technique loved by crafters and artists.
- Air Drying - The simplest way to retain a flower's three-dimensional form.
- Silica Gel Drying - Preserve shape and color with science-backed efficiency.

1. Pressing Flowers: The Art of Preserving Memories Flat
Flower pressing is one of the oldest, most cherished flower preservation techniques. It's a straightforward method that flattens blooms, making them ideal for scrapbooking, framing, cards, or botanical art. By removing moisture and carefully applying pressure, flowers retain their intricate patterns and subtle colors.
What You'll Need:
- Fresh flowers (not too thick or juicy)
- Parchment paper or absorbent paper
- Heavy books, a flower press, or weighty objects
- Scissors or pruners
Step-by-Step Guide to Flower Pressing
- Choose Perfect Blooms: Select flowers in peak condition -- not wilted, bruised, or damp. Simple flowers like pansies, daisies, violets, and ferns press best due to their flat surfaces.
- Prepare Your Flowers: If the blooms are bulky, gently split them in half or remove some petals. Use scissors to trim the stem close to the blossom.
- Arrange on Paper: Place your flowers between two sheets of parchment paper (or blotting paper) for moisture absorption. Careful arrangement at this stage ensures the finished pressed flowers look their best.
- Press and Wait: Insert the papers into the middle of a large book or flower press. Place additional heavy books on top for added pressure. Leave in a cool, dry place.
- Patience is Key: Pressing takes 2 to 4 weeks for most flowers. Check periodically (and replace paper if it feels damp) to avoid mold.
- Reveal and Display: Once fully dry and crisp, gently remove your pressed flowers. Use tweezers and place them in frames, journals, or collage art for lifelong enjoyment.
Tips for Optimal Pressing:
- Lay petals and leaves flat to prevent wrinkling.
- Avoid direct sunlight to preserve color integrity.
- Use acid-free materials for archival quality.
2. Air Drying: The Simplest Method for 3D Flower Preservation
Air drying remains one of the most popular and straightforward flower preservation techniques, perfect for bouquets, wildflowers, and robust garden favorites. This method maintains much of the plant's natural shape and creates charming, rustic decor for wreath-making or floral arrangements.
Ideal Flowers for Air Drying
- Lavender
- Roses (smaller varieties)
- Statice
- Baby's breath
- Hydrangea
- Globe amaranth
- Yarrow
How to Air Dry Flowers Easily
- Harvest at the Right Time: Pick flowers when they're fresh, unwilted, and just before full bloom. Remove foliage from stems to prevent mildew.
- Bundle and Prepare: Gather 5-10 stems and tie them with a rubber band or twine. Bundling flowers in small groups improves air circulation and helps stems dry evenly.
- Hang Upside Down: Invert the bundles and hang them in a dark, dry, well-ventilated area (e.g., an attic, closet, or unused room). Darkness and low humidity help preserve color and prevent mold.
- Patience & Protection: Drying typically takes one to three weeks depending on flower type and humidity. Protect your flowers from dust by loosely covering with a paper bag (avoid plastic, as it traps moisture).
- Finishing Touch: When stems are stiff and blossoms feel dry, your preserved flowers are ready! Spray lightly with unscented hairspray to add durability.
Extra Tips:
- Thicker stems take longer to dry -- monitor them closely.
- Group similar flower types for even drying times.
- If you want brighter color, dry blooms quickly and out of sunlight.
3. Silica Gel Drying: Preserve Flower Shape and Color Like a Pro
If you want to keep your flowers' natural beauty, color, and intricate structure, Silica gel preservation is a must-try technique. Silica gel (available at craft stores) is a desiccant that rapidly removes moisture without flattening or browning petals, keeping blossoms looking nearly fresh.
What You Need:
- Silica gel crystals (not actually a gel, but a sand-like substance)
- Airtight containers (plastic or glass with a secure lid)
- Scissors, tweezers, soft brush
- Fresh flowers, free of dew or moisture
Preserving Flowers Using Silica Gel: A Step-by-Step Guide
- Prepare Your Flowers: Cut off excess stem, and ensure petals are dry. Trim away bruised petals.
- Layer the Silica Gel: Pour a layer of silica crystals (about 1 inch) into your container.
- Position the Flowers: Nestle your blooms face-up in the silica gel. Use tweezers for delicate blossoms. Gently sprinkle more crystals over the tops and sides--do not crush the petals.
- Seal and Wait: Cover the container with its lid, and leave untouched in a cool, dry spot for 5-7 days. Flower types with thicker petals may require up to 14 days.
- Reveal and Clean: After the drying period, carefully pour off most crystals, then use a soft brush or compressed air to remove leftover silica from petals.
- Display Your Masterpiece: Silica-dried flowers make breathtaking arrangements, resin art, or shadow box decor!
Helpful Hints:
- Wear gloves, as silica gel can be irritating to the skin.
- Silica gel is reusable: simply bake it in the oven as per package instructions after each use.
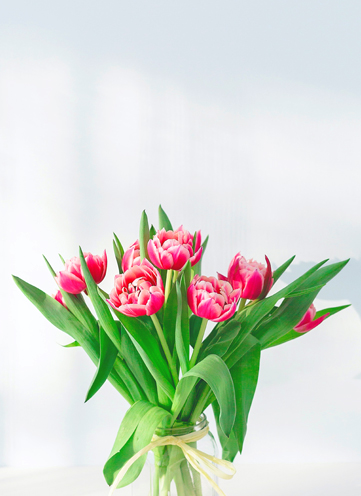
- Avoid using delicate, floppy flowers (like tulips) for best results.
Comparing the 3 Best Flower Preservation Techniques
| Technique | Best For | Time Required | Preserved Form | Difficulty |
|---|---|---|---|---|
| Flower Pressing | Crafts, Artwork, Cards | 2-4 Weeks | Flat, Paper-thin | Very Easy |
| Air Drying | Bouquets, Decor, Wreaths | 1-3 Weeks | 3D Shape, Some Color Loss | Easy |
| Silica Gel Drying | Arrangements, Gifts, Keepsakes | 5-14 Days | Near-Fresh Shape & Color | Moderate |
Tips to Make Your Preserved Flowers Last
Once you've successfully implemented straightforward flower preservation methods, it's important to care for your keepsakes to prolong their beauty:
- Keep Out of Direct Sunlight: Sun can quickly fade both color and detail.
- Avoid Humidity: Moisture can cause mold or wilt preserved flowers.
- Dust Gently: Use a dry, soft brush, or a gentle blow of air to clean dried floral arrangements.
- Handle With Care: Preserved flowers are delicate and should be touched as little as possible.
- Seal if Desired: Pressed or air-dried flowers can be lightly sprayed with a clear, matte fixative for protection. Resin casting is another option for advanced crafters.
Creative Uses for Your Preserved Flowers
With your flowers expertly preserved using these easy preservation techniques, a world of creative possibilities opens up:
- Frame your pressed or dried flowers for timeless wall art.
- Make unique bookmarks by laminating pressed blooms.
- Add preserved petals to homemade candles, soaps, or jewelry.
- Create a shadow box display commemorating weddings, proms, or anniversaries.
- Use air-dried bouquets for rustic home decoration.

Frequently Asked Questions about Flower Preservation
Q: Can I preserve any type of flower using these methods?
A: Most flowers can be preserved, but results vary. Sturdy, less-moist types (like roses, lavender, daisies, and statice) work best. Very delicate or watery flowers (like lilies or tulips) may lose color or shape regardless of the method.
Q: Is it possible to preserve an entire wedding bouquet?
A: Yes! Air drying or silica gel drying are best for bouquets. Remove any fading blooms and dry as soon as possible for best results.
Q: How long do preserved flowers last?
A: Well-preserved flowers can last for years if kept dry, out of sunlight, and handled gently. Air-dried and pressed flowers may fade over time, while silica gel-preserved blooms often retain color longer.
Conclusion: Transform Moments into Lasting Keepsakes
Preserving flowers is more than a craft -- it's a way to cherish precious memories, beautify your home, and enjoy the natural world's wonders all year round. Whether by pressing, air drying, or using silica gel, these three straightforward flower preservation methods enable you to capture the elegance of your favorite blossoms for countless creative projects.
So, go ahead and implement these simple flower preservation techniques--and savor the beauty and meaning of your flowers for a lifetime!
Latest Posts
How to Achieve the Perfect Hydrangea Bloom Cycle
Intriguing Birthday Blooms to Delight
Which Floral Beauty Defines Your Personal Aura?